When it came to creating a wedding website, I knew that this was something I wanted Mr. Cupcake and I to have, but I didn't know where to begin. I wanted something more than what The Knot has to offer, but I wasn't thrilled with all of the template options out there. Either the designs weren't customizable enough or representative of my taste, or the prices were ridiculous. The main purpose of having a wedding website was to be a source of information for our guests, but was it too much to ask to have it look cute without putting a dent in my bank account? I knew I could put something together on my own, I just had to figure out how.
Enter iWeb. (Insert the sound of angels singing.) This handy Mac program was included with my MacBook Pro, and it is as fool-proof as they come. It took me a few evenings of tinkering with the features and pre-made templates to figure out how to create my own design template, but once I did it was super simple. Below is the step-by-step of how I did it, and hopefully it will help some of you create your own fabulous wedding website!
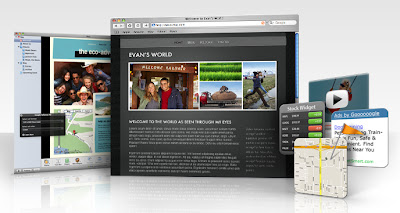
1. Open iWeb and choose a template
iWeb has several design templates to choose from. If you find one that is totally "you", you're in luck. I, on the other hand, tend to make things difficult for myself, and I wanted to create my own template. I began with the simple "White" template, beginning with the "Welcome" page, but deleted all of the components so I could place my own elements on the page. This is what took me the longest, because I knew that I would be duplicating this page as the base for all of the other pages, so I wanted everything to look perfect before moving on.

It is a great idea to do some sketches or have a rough idea of what you want your website to look like before you begin, so you can organize your steps accordingly, instead of just putzing around for several hours like me :-)
2. Start designing your home page.
To place your own elements, you need to make sure that the Inspector is open (click on the Inspector button on the bottom right of your layout).

If you want to insert blocks of color to anchor your design, you can begin with the "shapes" button in the toolbar at the bottom of your layout.

Click on the shape you would like to insert, and it will pop up on your layout. Using your inspector, click on the "graphic inspector" button to change the fill color, add an outline/stroke, shadow, etc.
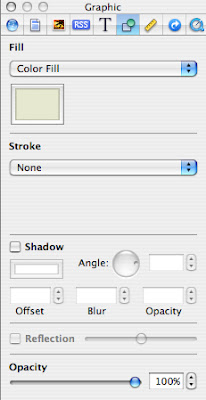
You will also need to use the "colors" button in the toolbar to customize the color you would like to use, and use your mouse to move the shape or adjust the size.
(You can also use the "page inspector > layout" button to customize the width of your layout, add a page background color, and a browser background color, if you so wish. And make sure to SAVE SAVE SAVE as you go!!)
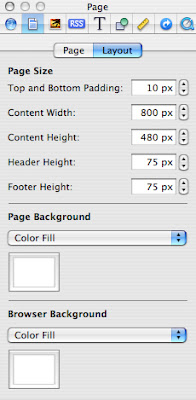
The same rules go for placing text. To create a text box, simply click on the "text box" button next to "shapes." Your text box will pop up in your layout for you to place and resize as you see fit. When you have it where you want it, start inserting copy and click on the "text inspector" in your Inspector window.
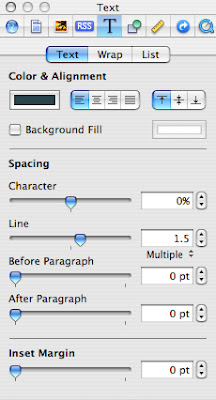
This will give you the opportunity to adjust the color, alignment, and placement of the copy in your selected text box. To adjust your font, highlight the text you'd like to adjust and click on the "fonts" button in the toolbar to choose from the fonts on your computer. It is best to use fonts that are commonly on most computers, like Times New Roman, Arial, etc. Using an obscure font will mean that if someone doesn't have that font on their computer, they will not be able to see the font that you chose.
If you want to insert text that is in a fancier font that most people viewing your website won't have on their computers, you can create a layout with your type in Photoshop or another image-editing program, and insert the file the same way you would a photo (see below). I did this using the Fling font that was used on the now defunct Blueprint magazine masthead.
3. Add images to your layout
I knew I wanted to use our wedding website to highlight some of the great engagement photos that our photographers, The Wiebners, had taken for us. Once I purchased some of the electronic files from them, I resized them in Photoshop to make them 72 dpi (which is ideal resolution for web images), and I saved them in an iPhoto album called "website photos" for easy accessibility. When I wanted to add a photo to my page layout, I clicked on the "media" button in my toolbar, found the image I wanted to insert, and simply dragged it onto my layout.
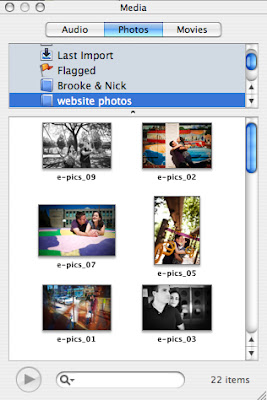
Once you drag an image into the layout, you can play around with the "mask" feature to crop the image to your liking, if you haven't already cropped it in a photo editing program like Photoshop.
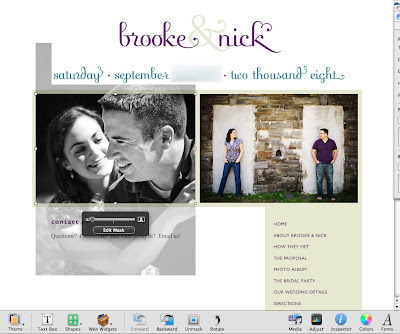
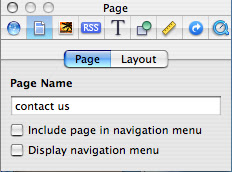
You might also have to go back to your "graphic inspector" window to turn off any borders that show up automatically when you drag your image in — this might happen depending on the default setting of the iWeb template you started with.
4. Add a navigation bar
Obviously, your website is going to evolve as you go, but it's a good idea to at least create a placeholder for your navigation bar so you don't forget about it. Your iWeb template layout comes with a standard navigation bar, but it was not customizable and "pretty" enough for me, so I decided to turn it off in the "page inspector" window and add my own.
I started by inserting copy on top of the box I placed on the right side of my layout, with the names of the different pages I wanted to create. Later, I'll tell you how to link each of the page names to the correct page.

5. Duplicate your home page
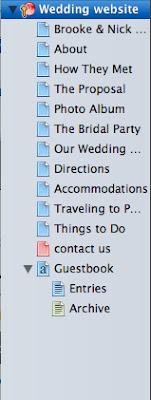
Once you are happy with how everything looks, make sure your page is selected on the left and go to "Edit > Duplicate" to duplicate your design. Rename your page to be whatever you'd like by double-clicking it in your page listing on the left. Then, simply edit the components of that page based on how you'd like it to look and any new content you would like it to include. You can do this as many times as you'd like to create all of your wedding website pages!
6. Create a guestbook
I was frustrated to find that there was no guestbook feature in iWeb, until I figured out that I could use the blog feature to create a makeshift guestbook. I went to "File > new page" and chose the "blog" page from the template I had been using. When the blog page showed up, I clicked on the "entries" sub-category in my page listing on the left, deleted all the components EXCEPT the main text boxes where the dummy blog copy was, and turned off the navigation menu in my "page inspector". (Leave the main "Blog" page alone for now, as you won't be linking to it for visitors to see.)
I adjusted the page size in my "page inspector > layout" to match the size of the rest of my pages. I then selected all of the components from one of my other pages (Apple A), copied them (Apple C), and pasted (Apple V) into the blog layout. I changed the name of my blog entry by double clicking on the "title" up top and writing simply "sign our guestbook." In place of the first entry, I put an intro paragraph ("Please leave a comment below to sign our guest book"), so every time someone leaves a comment it actually appears as a guest book entry.

7. Create links in your navigation bar
To link all of the pages in your navigation bar, begin on your home page; make sure that all of your pages are listed to your liking and in the order you'd like them to appear in. Individually select each page name, and go to "inspector > link inspector > hyperlink". Click on "enable as a hyperlink" and then "link to > one of my pages". A drop-down menu will appear with all of your page names, so you will select the page that you are linking to and make sure that "make hyperlinks active" is checked.
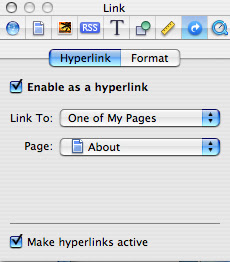
You can click on the "format" tab to customize the colors you'd like your links to be before/after they have been visited.
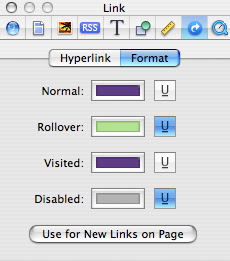
Do this for all of your page links on your home page; then, simply select the text box that has all of your navigation links in it, copy, and paste it into each page. When you paste, it should be in the same exact position on the page as it was on the page you are copying from. Now all of your links should work.
If you created the guest book page, you will want to link to your "entries" sub-page, NOT the main Blog/Guestbook page. By linking directly to the entries page, your comments will show up directly below your intro paragraph, rather than on another page, so it looks more like a real guest book.
8. Publish your site
I have a .Mac account, so I was able to publish my site to .Mac. I wanted our URL to be easy to remember (and not include my .Mac name), so I bought a domain name from Yahoo! and followed their easy instructions for hosting our site. Depending on your preference, there are several options for publishing your site when it is ready for the world to see.
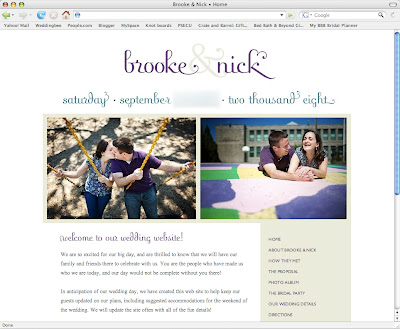
And that, ladies and gentlemen, is how to create a custom wedding website in iWeb! There are a lot more features to make use of, but I think once you master these you will find that everything else is simple.
I hope I haven't bored you too much, and I hope this information is actually useful to one or two of you :-) If you have any questions, please feel free to comment and I'll do my best to get back to you!


1 comment:
Hey, nice site you have here! Keep up the excellent work!
How to Create Wedding Website
Post a Comment